Showing posts with label Tutorials. Show all posts

Monday, September 17, 2012

Design a Coffee Cup Icon in Illustrator

Vector Coffee Cup
Yesterday I wrote an article about a logo I created for a new ministry at our church. I wanted to create a step-by-step tutorial to show you how I created the coffee icon for the logo.

If you have the Adobe Creative Suite, Illustrator is the program we will be using. A general rule of thumb, in case you are not familiar with it, is that InDesign is reserved for page layout, Photoshop for image editing, and Illustrator for logos and designs.

If you have not dabbled much with Illustrator, take heart, because neither have I. If you have a basic grasp of InDesign, Illustrator should come easy.

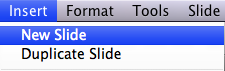
Start by opening and a new document and making it 10 inches by 10 inches.

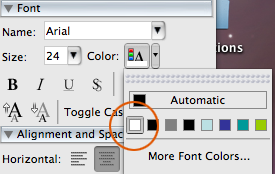
The first step is just to create a circle. So take the Circle tool and hold shift to create a perfect circle. Fill it with Blue. If you want my exact color, the CMYK values are C=85, M=48, Y=0, K=0.


Now we are going to create the base of the cup. Find the Rounded Rectangle Tool, Click and hold on the Rectangle tool to reveal more options. You will find it there.

Begin to draw a rectangle. While you are still holding down the mouse button, tap the Up arrow key a couple of times. You will see the box begin to curve on the ends. Do your best to match the sample photo below. You do not want a complete circle because our cup is not a complete sphere. We want the bottom to be curved, but the top to be straight. Make the fill the same blue color and give it a white outline. You may need to adjust the stroke to make it thicker.


Now that you have our basic circle and rounded rectangle, create a generic rectangle that we are going to use to cut the cup shape in half. I changed my rectangle color to green just to show you the contrast. Place it at about the height that I did. You want a little bit of the straight edge of our rounded rectangle to show, but not too much because we don’t want a 5 gallon cup.
Next, find the Pathfinder palette. If you don’t already have it open somewhere, go to Window > Pathfinder. Selecting both the new rectangle we just made and our rounded rectnagle coffee cup, choose Subtract in the Pathfinder palette. It is the second option from the left. Then click Expand. Now we’ve got a circle and a cup.

Copy this cup layer and paste it in place on top of the current cup using Command + F, or go to Edit > Paste in Front. Invert the colors and turn off the now blue stroke to leave us with just a white fill. Shrink the new shape while holding Shift and nudge it slightly so that it leaves a small gap all the way around except at the top. Reference my picture below.

Now zoom in and add an anchor point to the middle of our new shape. Either press the plus key, or click and hold the Pen Tool to view more options. You want the Add Anchor Point Tool.


Using the Direct Selction Tool (White Arrow), nudge down the top left corner, our new point we just created, and the top right corner to match my image below. We want to create the effect of liquid inside the cup.

But liquid isn’t straight edged, it’s wavy, so we need to add a curve to our line. Now you need the Convert Anchor Point tool, it looks like a wedge. You’ll find it by clicking and holding the Pen Tool again and choosing the bottom option.


Click on our center anchor point that we added and, while holding down the mouse, drag out to give our anchor point some curve adjustment arms. Adjust these until you are satisfied with the wave of your coffee.

Now we need to create the handle for our cup. This is going to combine two tasks we have already completed for the cup so far. You need to create one shape based on a rounded rectangle for the handle.

Then copy and paste that shape, scaling it down and nudging it so that the handle maintains the same width from top to bottom. I have changed my second shape green for contrast.


Now substract it out using the Pathfinder palette and click Expand.


Next you need to duplicate the main cup body. Copy it and paste it in front with Cmd + F. Then bring it to the very front of the document by pressing Shift + Cmd + ] or going to Object > Arrange > Bring to Front.


 Select both the new cup body and the cup handle and use the Subtract tool again. Click Expand. Now your cup should look like this:


The final bit is to create the steam wisps. Zoom in above the cup. Take the Pen tool and make four anchor points. One at the top to start. Then click half way down to where you want to end, and, while holding the mouse down, drag out a curve. Now click a third point at the bottom. Create your final point in the middle to the side of your other point and make another curve. Complete it by clicking your original point to close the path.


Duplicate that shape twice, scaling one down slightly and the other even more. Space them out and you’re done.


You should have something that looks like this:

Sunday, September 16, 2012

SNAC Shop Logo

The latest design opportunity that I have had was to work on a few logos for our church. I hope that these logos will provide inspiration for you. I will also walk you through the steps I went through to create the logo. I will feature more of the logos that I created in the days to come. We'll start off with just one today.

The first logo is for an upcoming event, the SNAC Shop. SNAC stands for Sunday Night After Church. The SNAC Shop will provide coffee and snacks after the evening service in the fellowship hall to promote church fellowship and raise money for the youth group.

Here is the finished product:


To begin. I searched the internet for various church logos to get ideas. Unless you've got an amazingly creative mind, searching for inspiration is essential. I often get ideas from looking at other works and putting my own spin on it and rarely have epiphanies that come to me out of pure ingenuity.

I search places like CreationSwap, ShareFaith, and Graceway Media. You can check out my review of each of these sites in a post I made several months ago.

I found this logo on CreationSwap and it was the basis of my idea for the coffee icon.
Music Cafe
The circle came based upon a series of info graphics I found on the web, and the rest of the "design" complimenting the circle was just from messing around to see what looked good with the same sort of a theme.

However, the most critical part of most design is the font selection. You can visit various sites like dafont.com, 1000fonts.com, or fontfreak.com to find some good fonts. This particular font was Neometric and was downloaded from DaFont. You can download it, if you like, by going here.

Neometric Font

The coffee cup was created in Illustrator using various tools like the pen and pathfinder. I have created a step by step Illustrator tutorial for creating a basic graphic like this. It wasn't difficult, but you do have to know what tools to do in order to get the desired effect.

Some additional designs are shown below:

SNAC Shop Logo

SNAC Shop Web Ad

SNAC Shop Web Ad

Thursday, May 17, 2012

Tutorial: How to Make a Powerpoint

Microsoft Powerpoint
This is a simple guide designed to teach you how to make a Powerpoint. It is by no means detailed or technical and I am in no way an expert on Powerpoint. Again, I cannot over emphasize the importance of using Powerpoint in your services. It will increase attention and memory retention, it helps with those who didn't hear what you said, and it will boost the excitement of your church. I have given you all the instructions that you need to get this setup in your church. I strongly encourage you to start using Powerpoint as soon as you are able. The biggest obstacle for doing this is not knowing how to make a Powerpoint in the first place. Well here it is:

Step 1: Purchase Powerpoint
Chances are you already have Powerpoint. If you have Microsoft Office, then you have Powerpoint. You'll have to look around. Check your applications folder. Almost every one uses Microsoft Word. Find Word and then look in that area for Powerpoint. If you don't have Powerpoint, then you need to purchase it. The cheapest way is purchase Powerpoint individually, and if you don't already have Word, then you probably haven't needed it so far meaning it would be fine to buy Powerpoint alone.

Powerpoint Price
However, it's only beneficial to do this if you can qualify for the Academic purchase. Academic Super Store is selling Powerpoint here for $50 (and that seems to only be a special price, if you are reading this months or years after it's publish date, this price will likely be much different). Otherwise, buying Powerpoint alone from Microsoft will cost you $140, that's $20 MORE than purchasing the full Office Suite which comes with Excel and Word. Don't ask me why they do that. It seems counter productive to me. Who will pay more money for less software? That's a bad marketing plan right there. You can purchase the full Office suite from Microsoft for $120.

Step 2: Setup Your Presentation
Begin by opening Powerpoint. The locations of palettes and appearances of menus may be slightly different for you than what you see here because I'm operating on an older version of Powerpoint as well as Mac computer. Everything should be in relatively the same place, though. You don't need to do this first step, but if you don't and you are following these directions to a "T" (including using my slides) then things will look a little different. Go to File > Page Setup, and change the document size to 12 x 8. This is the size of my slides.

 
Next, let's get familiar with the screen that you see once you open a new presentation. Your slides are located in the upper left hand corner. Currently, we only have one slide, we'll add a few in a minute. If you click where it says, "Click to add title," then you can type in your own information on this blank white slide. 


Now let's add a few slides. Go to Insert > New Slide and do that a couple of times. Now you have a few slides. Notice that I now have 4, this tutorial won't need that many, but you will want A LOT more for your church presentation.

 
But white is dreadfully boring for a Powerpoint, so let's change the background. For my screen, I have a palette called the Formatting Palette off to the right. In there is an option for slide designs. If I click on one of them, the background will change. These are default slides Powerpoint gives you, and you could technically use these in your service and never purchase or download any other slides (they'll just look plain). If you don't have this palette, keep reading, we'll get there.


To change the background without the Formatting Palette go to Format > Slide Design and the options will be listed for you.
Now we want to insert our own custom slides. To do that, download some here. Then go to Insert > Picture > From File. Find where you saved the files (Make sure you unzip them first), select the Welcome slide and press OK. 


Your screen should look like this. 

Next, move to the second slide by clicking on it in the upper left hand corner and add the Sermon Title slide.
If you added the Sermon Title slide, you'll need to add your Scripture passage. To do that, we need to add text. This step will show you how to add text anywhere on any slide, not just for this slide. If you have the formatting palette visible, go over to it and click on the item shown in the picture below.


This is a text box. To get there without the Formatting Palette, go to Insert > Text Box. Now click and drag where you want the text box to go. The place created for it on this slide is right below the line.


Now before you go typing away, there's a few formatting issues we need to take care of. We need to center the text and turn the color of the font to white (the default is black which won't look good on our dark blue background). Go back to the handy Formatting Palette (by the way, to turn this on go to View > Formatting Palette) and select the Font option. Click the color box and change it to white. Then change the size of the font to 36.

Next select the Alignment option. Click the "Center" alignment button. Now you're ready to type. If you still don't have the Formatting Palette out or can't find any of this, you can edit it all by going to Format > Font.


Type in your Scripture. Your screen should now look like this (almost).


Now just keep adding slides and typing in all your information until you have everything done. To see what you Powerpoint presentation currently looks like, go to Slide Show > View Show. Now we want to add some Custom Animations to spice up your slide transitions. Be careful here, some of the can look tacky. We want our presentations to be sharp and eye catching, not boring or tacky. Go to Slide Show > Custom Animation for this.


To add an animation, click on the picture slide and start browsing the animation gallery. A preview is included when you click on each one so that you can see what it will look like.


Once you have chosen one, you can adjust the speed of the animation if it is too slow or too fast. Do this by selecting the speed option and changing the seconds it takes to complete.


Now click OK. At this point, you know everything you need to know about setting up a Powerpoint presentation. If you have questions or don't understand a particular step, feel free to leave a comment below and I will answer your question as soon as possible. If something is unclear, you can also leave a comment and I will edit the tutorial to make it more understandable.

Step 3: Share It With Your Friends
Did you find this tutorial helpful? Someone else probably would too, share it on Facebook or Twitter by clicking the buttons below.

Tuesday, May 15, 2012

Tutorial: How to Make a Church Facebook Page

A few weeks back we discussed the importance of Social Media in your church. Making a Facebook page is not difficult at all, and instructions for doing this can be found just about anywhere on the web. However, for how easy it is to setup, not many churches have a Facebook page. It could be because no one knows how to use Facebook, but that seems unlikely. Instead, I think the real reason is that many people don't understand the benefits of having one.

Pine Forest Estates Baptist Church currently has 136 likes and about 200 people in attendance Sunday Morning (including children). That means that roughly half of the church folk have Facebook and are aware that our church has a page. Murray River Baptist Church currently has 47 likes and about 60 people that attend Sunday Morning. That's about three quarters of the church people. With this many people connected how can you NOT have a Facebook page?

Having a page allows your church to keep in contact with old members who have moved out of state or family that have visited, but live out of town. They are able to stay updated on what's been going on since they have been gone. It allows you to make those vital reminders like "Remember tomorrow is the potluck dinner, don't forget your covered dish!" It also allows you to be an encouragement to folk, "Even in the hard times, Jesus cares, cast all your burdens on Him." It can also be used for sharing important links. The other day, my church posted a link to Thom Rainer's post Five of the Most Difficult Challenges for Pastors encouraging us to do our pastor a favor and read the article. That's only a few reasons to use Facebook; there are many more.

A Simple Guide to Creating a Church Facebook Page
Step 1: Login to Facebook
It's as easy as logging in to Facebook and got to
http://www.facebook.com/pages/create.php to begin.

Step 2: Create the Page
Next choose which type of page you would like to create. For a church, you will want the "Company, Organization, or Institution" option. Choose Church or Religious Organization, type in your church name, agree to the terms and click "Get Started."


Step 3: Setup Your Page
Now there are a couple of things you need to do to get started. First, you should upload your church logo in the profile picture spot. Hover over it and the option will become available. Secondly, upload a Cover photo. If you do not have a nice photo for the cover page, go take one. Preferably, it should be of your church building so that any visitors to your Facebook page can see what your church looks like. This way they know what to look for when they come for a visit.


Here's a quick tip about taking a nice photo. Make sure it's a beautiful day. Sunshine is welcome on a building, so long as it is on the front of the building. If it's on the back facing you, harsh shadows will be cast over it and you'll likely get lens flare. Blue skies and green grass make your church look inviting. Don't use winter church photos or photos from a rainy day.

Step 4: Invite Your Church Members
The primary purpose of your Facebook page will be to inform your church members of events and remind them of important announcements. Yes, the page can also draw guests and visitors, but that is not it's primary purpose. Invite your church members to "Like" your church. 

Step 5: Announce it in Church
Tell your church on Sunday for anyone who you might not have as friends. Add a "Like us on Facebook" slide to your church powerpoint. Any guests in attendance will also now be aware that you have a Facebook page and may check it out when they get home.

Step 6: Add a "Like Us" Button To Your Website
Go here to get a Like Box. Type in your church Facebook address, decide on a box width (I did about 300), choose whether you want to see your latest updates streamed onto the box (I chose not to) and whether to show people faces or not. Afterwards, click "get code" then copy and paste the code to your website. I'm assuming that if you have a website, the guy who works on it knows how to at least paste code into it.


Step 7: Start Making Announcements
Now put your page to use. Make announcements, encourage people, post pictures, and offer valuable pages people should visit.


Design by Free WordPress Themes | Bloggerized by Lasantha - Premium Blogger Themes | Best Web Hosting Coupons