A Simple Guide to Projector Setup
This guide will help
you setup the physical projection equipment.
 Step 1: Purchase a Projector
If you do not have an digital projector,
invest in one. Not only will this be useful for yourself and your
church, but it will be helpful to any missionary that you have come
through. You can buy projectors almost anywhere: Best Buy, Digital Projection, Optoma, and View Sonic.
Projectors come in all shapes and sizes. Not sure how much you'll use
it? Buy a $300 projector. Do you want to use it every service? You'll
probably want something a little more expensive.
Step 2: Pick a Place to Put It
One
thing to consider before purchasing a projector is where you will put
it. Depending on your facilities, like if you rent a building for Sunday
morning, you may want to just set the projector on a table. It's easy
to take down and setup each week. If you own a church building and
intend to use the projector a lot, you may consider hanging it from your
sealing like our church does. It's out of the way, and always setup. If
you choose the latter option, make sure the projector you purchase is
able to hang from the ceiling. You may need to purchase additional
supplies for this.
Step 3: Purchase and Place a Screen
Step 4: Installing Your Projector
If you will put the projector on a table, no installation is necessary. Pull it out of the box, plug it in, and follow the next step. If you intend to hang it from the ceiling or plan to put it in any other fixed location read these two articles from ProjectorCentral and DoItYourSelf. The biggest thing is making sure you can fish the wires through the ceiling back to wherever your audio/visual booth is located.
Step 5: Connecting Your Computer
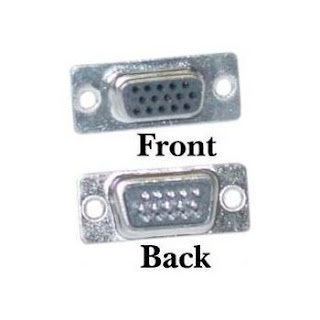
Most projectors connect using VGA and most laptops have it. This is a VGA Cable hookup:
If you have a Mac, chances are you have a DVI port instead. Newer Macs come with mini-DVI and older Macs come with standard. You will need one of the two following plugs for this. If your laptop did not come with it or you no longer have it, Google "Mac DVI to VGA" to purchase one.
Step 6: Displaying Your Screen
This could take a little bit of work depending on your laptop. If you have a Mac, it's simple. Open System Preferences, choose Displays, and then click Detect Display. If it's connected properly, your screen will show up. For PC, the easiest way is by pushing the F-key with a box in it. Hit this a couple times and see if your screen displays. If it does not, you may need to hold down the function key, then press it. If you do not have an F-key with a box in it then go here.
That's it. Your done.

 7:12 PM
 T.L. Branson


 Posted in:


1 comments:
Great! This service is useful for everyone whose related to technical field and to know more visit here.. projector installation .
Post a Comment